How to use a uni - directional microphone for live sound reinforcement?
When it comes to live sound reinforcement, the choice of microphone can significantly impact the overall audio quality. Among various types of microphones, uni - directional microphones are highly favored due to their ability to pick up sound from a specific direction while rejecting background noise. As a uni - directional microphone supplier, I'm here to share some insights on how to use these microphones effectively for live sound reinforcement.
Understanding Uni - Directional Microphones
Uni - directional microphones are designed to capture sound primarily from one direction. There are different patterns of uni - directional microphones, such as cardioid, super - cardioid, and hyper - cardioid.
- Cardioid Microphones: These are the most common type of uni - directional microphones. They have a heart - shaped pickup pattern, which means they are most sensitive to sound coming from the front and less sensitive to sound from the sides and rear. Cardioid microphones are great for general live sound applications, like on - stage vocals and solo instrument performances. For example, if a singer is using a cardioid microphone during a live concert, it will focus on the singer's voice while reducing the influence of the background music and audience noise.
- Super - Cardioid and Hyper - Cardioid Microphones: These have a more focused pickup pattern compared to cardioid microphones. They are even more sensitive to sound from the front and have a smaller area of sensitivity on the sides and rear. Super - cardioid and hyper - cardioid microphones are often used in situations where there is a lot of ambient noise or when you need to isolate a specific sound source. For instance, in a large outdoor festival, a super - cardioid microphone can be used to pick up the sound of a single instrument on a crowded stage.
Selecting the Right Uni - Directional Microphone
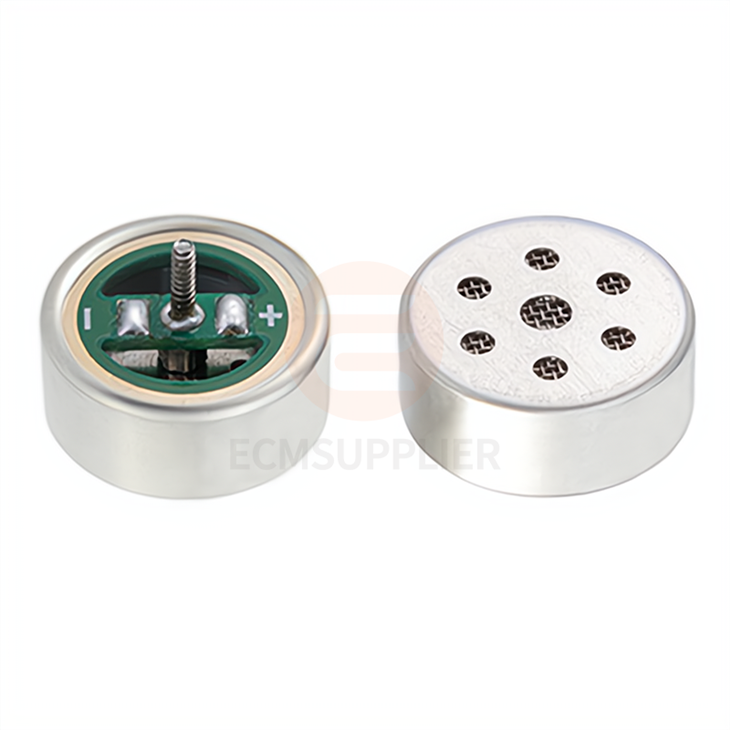
As a supplier, we offer a range of uni - directional microphones to meet different needs. For example, the 1045 Single Directional Microphone with Soldering Wired is a high - quality option for various live sound applications. It has excellent sound pickup characteristics and is suitable for both vocals and instruments.
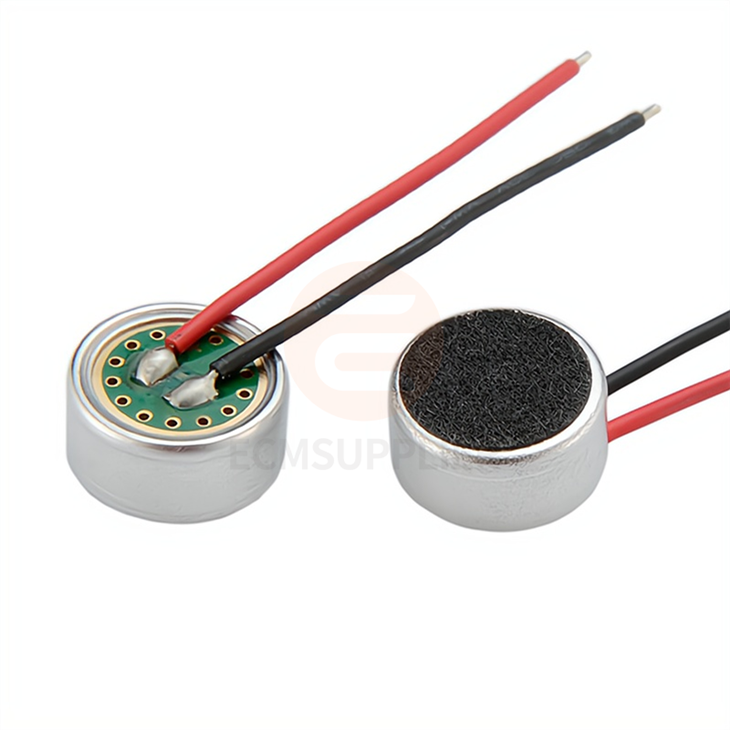
If you need a more compact and lightweight option, the 1668 Electret Condenser Microphone might be a great choice. It is easy to handle and provides clear and accurate sound reproduction.
For applications that require a microphone with a pin for easy installation, the 4015 Single Directional Microphone with Pin is an ideal solution. It can be quickly and securely attached to different sound equipment.
Setting Up the Uni - Directional Microphone
- Positioning: Proper positioning of the uni - directional microphone is crucial for optimal sound pickup. For vocal applications, the microphone should be placed at a distance of about 2 - 6 inches from the mouth, depending on the singer's style and the type of microphone. If the microphone is too close, it can cause a "plosive" effect, which is a sudden burst of air that creates a loud popping sound. If it is too far away, the sound may become weak and lack clarity.
- Angle: The microphone should be pointed directly at the sound source. For a singer, the microphone should be angled slightly upward towards the mouth. When using the microphone for an instrument, such as a guitar or a saxophone, it should be positioned to capture the sound directly from the sound - emitting part of the instrument.
- Mounting: Use a good quality microphone stand or clip to hold the microphone in place. A stable mount will prevent any unwanted movement or vibrations that can affect the sound quality. Make sure the mount is adjusted to the correct height and angle for the sound source.
Adjusting the Audio Settings
- Gain: The gain setting on the audio mixer controls the input level of the microphone. It is important to set the gain correctly to avoid distortion. If the gain is set too high, the sound will be distorted, especially when the singer belts out a high - note or when the instrument plays a loud passage. If the gain is set too low, the sound will be too quiet. Start with a low gain setting and gradually increase it until you get a clear and balanced sound.
- Equalization (EQ): EQ allows you to adjust the frequency response of the microphone. You can boost or cut certain frequencies to enhance the sound quality. For example, you can boost the mid - frequencies to make the vocals more present or cut the low frequencies to reduce any unwanted rumble or background noise.
- Compression: Compression is used to control the dynamic range of the sound. It can make the sound more consistent by reducing the difference between the loudest and softest parts of the audio. This is especially useful for vocals, as it can prevent sudden volume spikes and make the voice sound more even throughout the performance.
Maintaining the Uni - Directional Microphone
- Cleaning: Regularly clean the microphone to remove any dust, dirt, or saliva. Use a soft, dry cloth to wipe the exterior of the microphone. For the microphone grille, you can use a small brush to gently remove any debris.
- Storage: When not in use, store the microphone in a protective case to prevent damage. Keep it in a dry and cool place to avoid any moisture or temperature - related issues.
- Testing: Periodically test the microphone to ensure it is working properly. You can do this by connecting it to an audio system and speaking or playing an instrument into it. If you notice any problems, such as a loss of sound or distortion, have the microphone checked by a professional.
Troubleshooting Common Issues
- Background Noise: If you are experiencing background noise, first check the positioning of the microphone. Make sure it is pointed directly at the sound source and away from any noisy areas. You can also try adjusting the gain and EQ settings to reduce the background noise.
- Distortion: Distortion can be caused by a high gain setting, a damaged microphone, or a problem with the audio system. Check the gain setting first and reduce it if necessary. If the problem persists, check the microphone for any visible damage or have it tested.
- Weak Sound: A weak sound can be due to a low gain setting, a loose connection, or a problem with the microphone itself. Check the gain setting and make sure all the connections are secure. If the problem continues, try using a different microphone to see if the issue is with the microphone or the audio system.
In conclusion, using a uni - directional microphone for live sound reinforcement requires a combination of proper selection, setup, and adjustment. By following these guidelines, you can achieve high - quality sound in your live performances. If you are interested in purchasing uni - directional microphones for your live sound needs, we would be happy to discuss your requirements and provide you with the best solutions. Contact us to start a procurement negotiation and take your live sound to the next level.
References
- "Sound Reinforcement Handbook" by David Miles Huber and Robert E. Runstein
- "The Mixing Engineer's Handbook" by Bobby Owsinski


