Connecting the 6027 electret microphone to a circuit can seem daunting at first, but with the right guidance, it becomes a straightforward process. As a supplier of the 6027 electret microphone, I'm here to walk you through the steps and provide you with all the necessary information to ensure a successful connection.
Understanding the 6027 Electret Microphone
Before we dive into the connection process, let's take a moment to understand what the 6027 electret microphone is and its key features. The 6027 electret microphone is a high - quality audio sensing device known for its sensitivity and compact size. It is commonly used in various applications such as voice recorders, mobile phones, and security systems.
One of the main advantages of the 6027 electret microphone is its omni - directional sensitivity. This means it can pick up sound from all directions, making it ideal for applications where you need to capture audio from a wide area. Additionally, it has a relatively flat frequency response, which ensures that the audio it captures is clear and accurate.
Components Required for Connection
To connect the 6027 electret microphone to a circuit, you will need the following components:
- 6027 Electret Microphone: Of course, this is the main component. You can be assured of its quality as we are a reliable supplier.
- Power Source: The microphone requires a power source to operate. A typical power supply voltage for the 6027 electret microphone is around 2 - 5 volts. You can use a battery or a regulated power supply from your circuit.
- Resistors and Capacitors: These passive components are used to bias the microphone and filter out unwanted noise. A common resistor value used for biasing is around 2.2k - 10k ohms, and a coupling capacitor value is typically in the range of 0.1 - 10 microfarads.
- Amplifier (Optional): If you need to boost the weak audio signal from the microphone, you can use an audio amplifier. There are many off - the - shelf audio amplifier modules available in the market.
Connection Steps
Step 1: Understanding the Microphone Pins
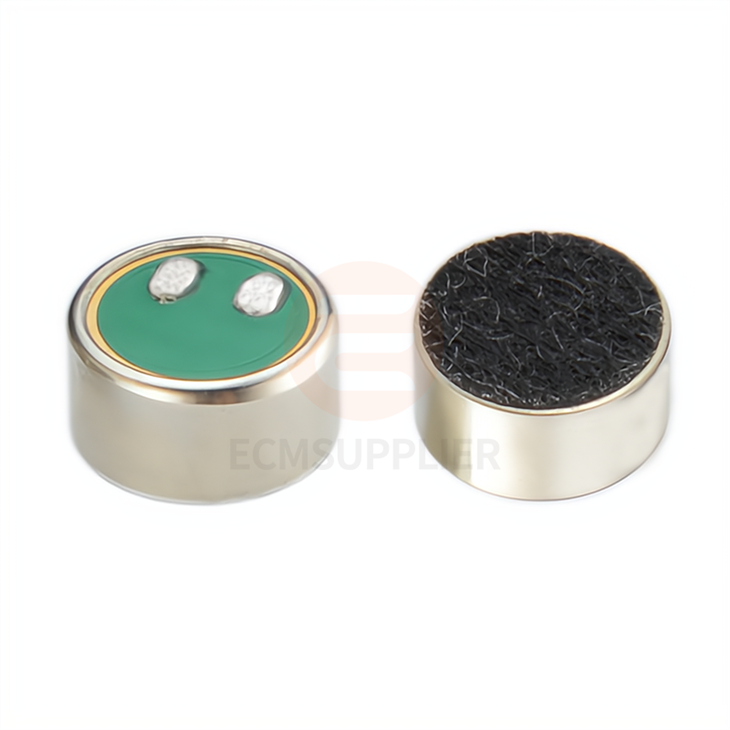
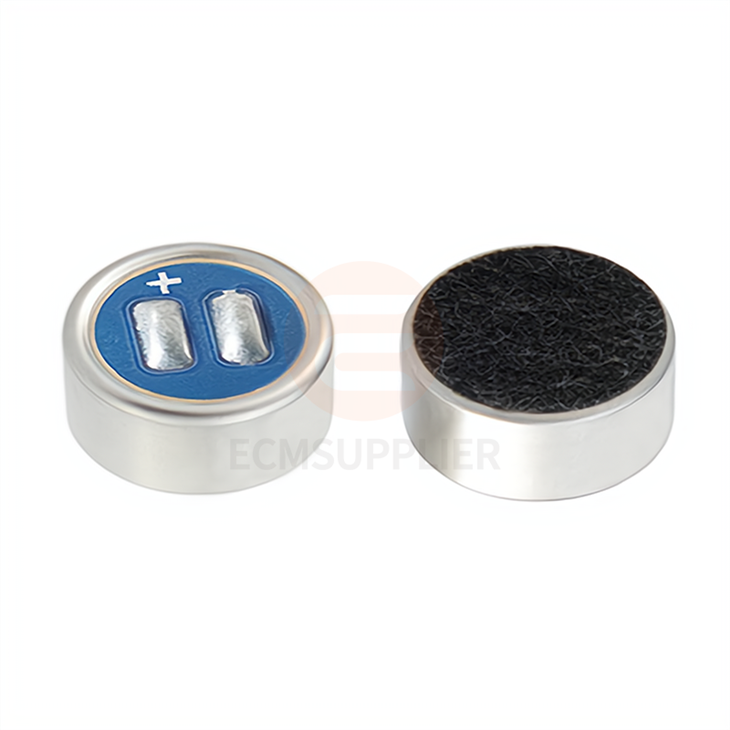
The 6027 electret microphone usually has three pins: a power pin (VCC), a ground pin (GND), and a signal output pin (OUT). The power pin is used to supply power to the microphone, the ground pin is connected to the circuit's ground, and the signal output pin provides the audio signal.
Step 2: Biasing the Microphone
Connect a resistor between the power source (VCC) and the signal output pin (OUT) of the microphone. This resistor is called the bias resistor. Its main function is to provide the necessary bias voltage to the microphone's internal amplifier. For example, if you are using a 5 - volt power supply, a 4.7k - ohm resistor can be a good choice.
Step 3: Coupling Capacitor
Connect a coupling capacitor between the signal output pin (OUT) of the microphone and the input of the next stage in your circuit (such as an amplifier or a microcontroller). The coupling capacitor blocks the DC component of the signal and allows only the AC audio signal to pass through. A 1 - microfarad capacitor is a common choice.
Step 4: Ground Connection
Connect the ground pin (GND) of the microphone directly to the ground of your circuit. This ensures a stable reference voltage for the microphone and the rest of the circuit.
Step 5: Power Supply
Connect the power pin (VCC) of the microphone to the positive terminal of your power source. Make sure the power supply voltage is within the specified range for the 6027 electret microphone.
Circuit Diagrams
A simple circuit diagram for connecting the 6027 electret microphone to a microcontroller can be as follows:
- Connect the positive terminal of the power supply (e.g., a 3.3 - volt pin on a microcontroller) to one end of the bias resistor.
- Connect the other end of the bias resistor to the signal output pin of the microphone.
- Connect the coupling capacitor between the signal output pin of the microphone and the analog input pin of the microcontroller.
- Connect the ground pin of the microphone to the ground of the microcontroller.
Here is a simple code example in Arduino to read the audio signal from the microphone:
const int microphonePin = A0;
void setup() {
  Serial.begin(9600);
}
void loop() {
  int sensorValue = analogRead(microphonePin);
  Serial.println(sensorValue);
  delay(100);
}
Troubleshooting
If you encounter issues during the connection process, here are some common problems and solutions:
- No Audio Signal: Check the power supply to the microphone. Make sure the voltage is within the specified range. Also, check the connections of the bias resistor and the coupling capacitor.
- Noise in the Signal: This could be due to improper grounding or a noisy power supply. Try using a decoupling capacitor across the power supply pins of the microphone to filter out high - frequency noise.
- Weak Signal: If the audio signal is too weak, you may need to use an audio amplifier. Check the gain settings of the amplifier if you are using one.
Other Related Microphone Products
In addition to the 6027 electret microphone, we also offer other high - quality microphone products. For example, the Miniature 6mm Omni Microphone Core is a great option for applications where space is limited. It has similar omni - directional sensitivity but in a smaller form factor.
The Omni - Directional Electret Condenser Capsule is another product that provides excellent audio capture capabilities. It is suitable for a wide range of applications, from consumer electronics to professional audio equipment.
If you need a waterproof microphone, our 9745 Microphone Core 9745 Ip67 Waterproof is the perfect choice. It can withstand harsh environmental conditions and still deliver high - quality audio.
Conclusion
Connecting the 6027 electret microphone to a circuit is a relatively simple process once you understand the basic principles. By following the steps outlined in this blog, you can successfully integrate the microphone into your project. Whether you are a hobbyist working on a DIY project or a professional in the audio industry, our 6027 electret microphone and other related products can meet your needs.
If you are interested in purchasing our 6027 electret microphone or any of our other microphone products, please feel free to contact us for more information and to start a procurement discussion. We are committed to providing you with the best products and services.
References
- "Electret Microphone Handbook" by Knowles Electronics
- "Audio Circuit Design" by Douglas Self


