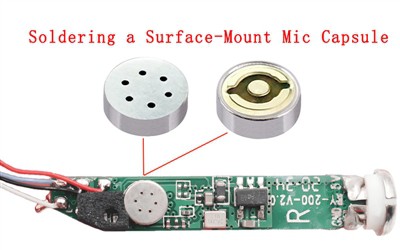
Soldering an SMD microphone capsule requires careful attention and precision. Below is a detailed guide covering preparation, step-by-step soldering instructions, important precautions, and automated soldering options.

1. Preparation
Tool Preparation
Ensure you have the right soldering tools, including a fine-tip soldering iron, tweezers, and a magnifying glass to help with detailed work.
Material Preparation
Gather the necessary materials: SMD microphone capsule, solder wire, and solder paste.
Environment Preparation
Make sure the soldering environment is dry, free from static interference, and has good ventilation to avoid overheating issues.
2. Soldering Steps
Inspect the Capsule
Begin by inspecting the SMD microphone capsule to ensure the solder pads are in good condition and the acoustic mesh on the bottom is intact. Only proceed with capsules that meet these quality standards.
Secure the Capsule
Use clamps or a suitable tool to hold the microphone capsule securely on the soldering platform for easy handling during soldering.
Apply Solder to the Capsule
Using a fine-tip soldering iron, apply a small amount of solder to the solder pads on the capsule. Avoid using excessive solder to prevent short circuits or compromising solder quality. Ensure the solder doesn't connect with the capsule's housing.
Solder the Connecting Wires
Tin one end of each connecting wire, then use the soldering iron to attach each wire to the corresponding solder pad on the capsule. Ensure the solder joints are smooth and rounded, without any cold soldering or sharp tips. Be careful not to mix up the positive and negative connections.
Self-Check
Once soldering is complete, inspect the solder points to make sure they are smooth, free from short circuits, and show no signs of weak or cold joints. Also, verify that the positive and negative wires are correctly connected.
3. Important Precautions
Control Soldering Iron Temperature
Maintain the soldering iron temperature at a safe level, ideally between 300°C ± 20°C or 350°C ± 10°C, to ensure good soldering quality and prevent damage to the capsule.
Limit Soldering Time
Limit the soldering time for each joint to avoid overheating. Each joint should be soldered within 1.5 to 2 seconds to avoid internal component damage due to heat.
Use Anti-Static Measures
Use anti-static tools, such as an anti-static wrist strap, to prevent damage to the capsule from static electricity during soldering.
Avoid Damage to the Capsule
Handle the capsule carefully during soldering to avoid mechanical or thermal damage.
Choose Appropriate Tools and Materials
Using the right tools and materials helps ensure soldering quality and improves efficiency.
4. Automated Soldering
If possible, consider using automated soldering equipment for SMD microphone capsules. Automated soldering provides high precision, efficiency, and stability, which can significantly improve production quality and speed.
However, keep in mind that operating automated soldering equipment requires specific programming skills and technical knowledge.


